
Partitioning your hard drive is a considerable method to manage your files, folders, and applications into their virtual drive. Every drive in use has at least one partition. Although there are benefits of having multiple physical drives for the same reason. Segmenting a single hard drive to improve the multi-level functionality with a lot of room on each without buying a new drive.
When we talk about hard drive labeled C:, D:, and so forth, we actually discuss the hard drive segmentation. You can decrease the allocated space and create anew one out of that additional space. Don’t worry, partitioning a hard drive in Windows is easy and typically takes a couple of minutes to do.
Benefits of Partitions:
- Backup System Files
- Install multiple Operating Systems
- Extend the functionality of the hard drive
- Improve security
How to do Windows Partition:
The easiest method to partition your new hard drive or existing hard drive is with Windows integrated Disk Management Tool. The standard Windows is impeccably fit for new partitions for you to work with.
Follow these simple steps to segment a hard drive space in Windows whether you are using Windows 10, Windows 8, Windows 7, Windows Vista or Windows XP.
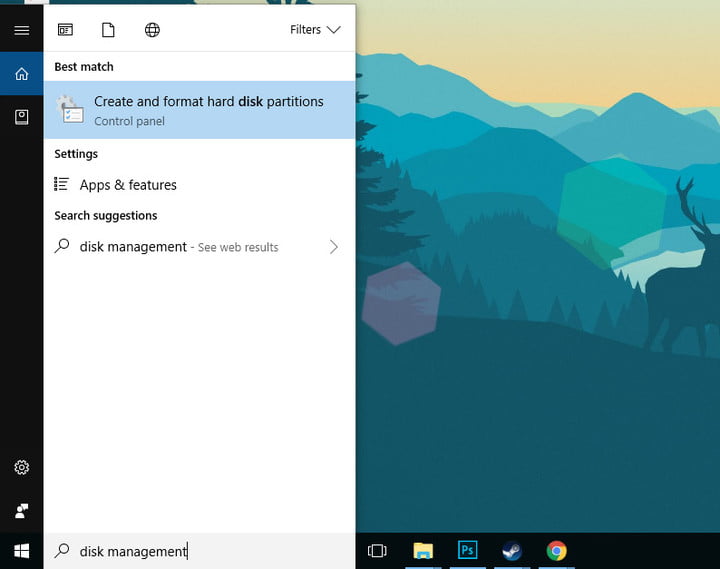
Step-I
Use Windows search box to search for “Disk management” and select “Create and format hard disk partitions” from the results box.
Open Disk Management. Click Start menu and search for “diskmgmt.msc”. In Windows 10, Disk Management is available on the right click of start button. Select “Create and format hard disk partitions” from the results box. Additionally, use the Windows “power user” menu (Win key + X) and click “Disk management.”
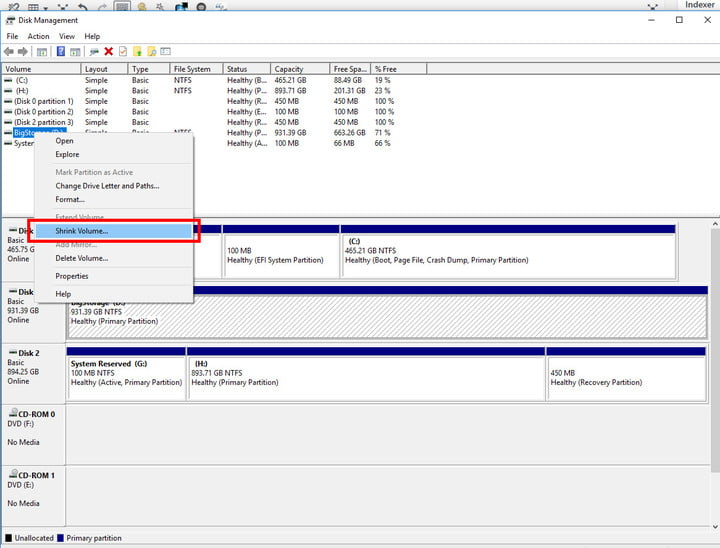
Step-II
Right-click the hard drive from the list of available drives you would like to segment and select “Shrink Volume”. If you are segmenting an existing drive, you need to create some “unallocated space” before you segment it. If you are using a new hard drive, skip to Step-IV.
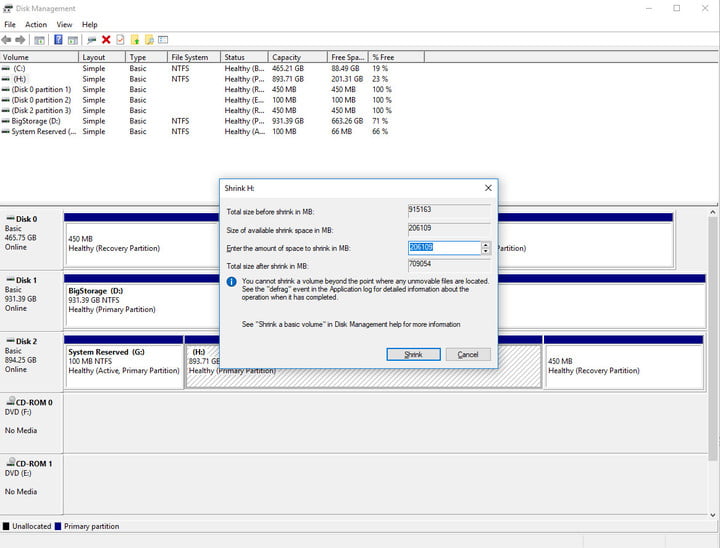
Step-III
If you want to define the size of specific partition, input the amount of space in megabytes in the respective field, before clicking “Shrink”. This process will take a few minutes based on the speed of your drive. But when completed, you’ll have a new “Unallocated” space displayed next to the corresponding physical drive in the bottom-half of the Disk Management Screen.
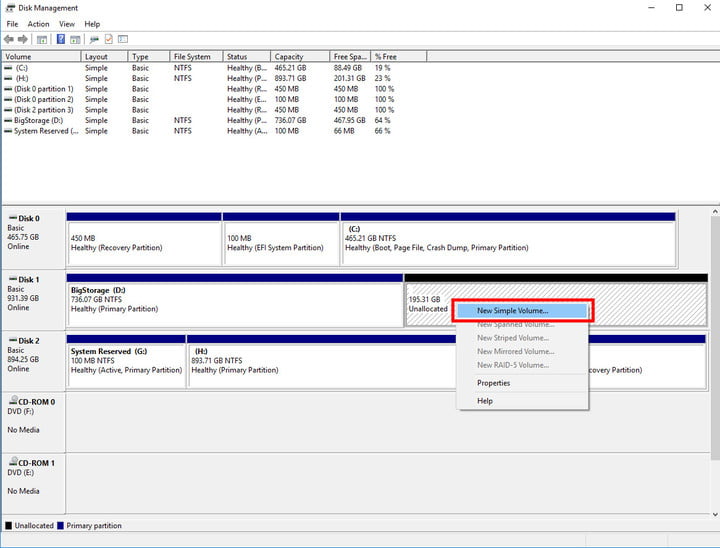
Step-IV
Right-click the “Unallocated” space and select “New Simple Volume” from the resulting menu.
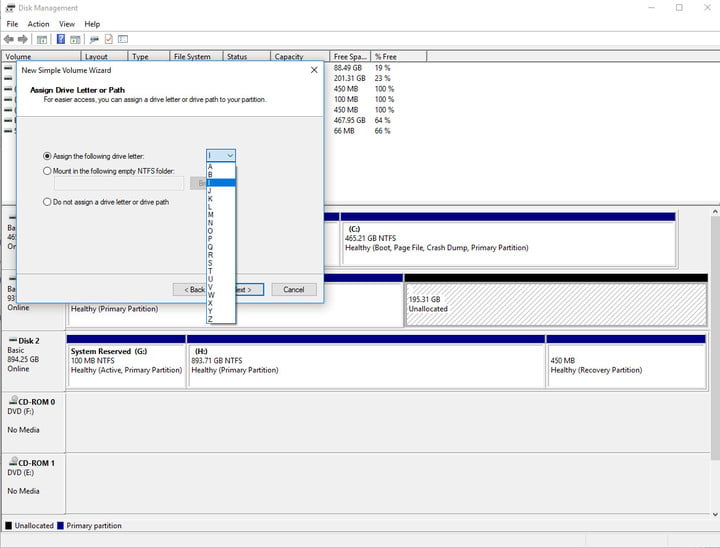
Step-V
Follow the on-screen instructions and select the size of the volume (the default will use all unallocated space) and the drive letter.
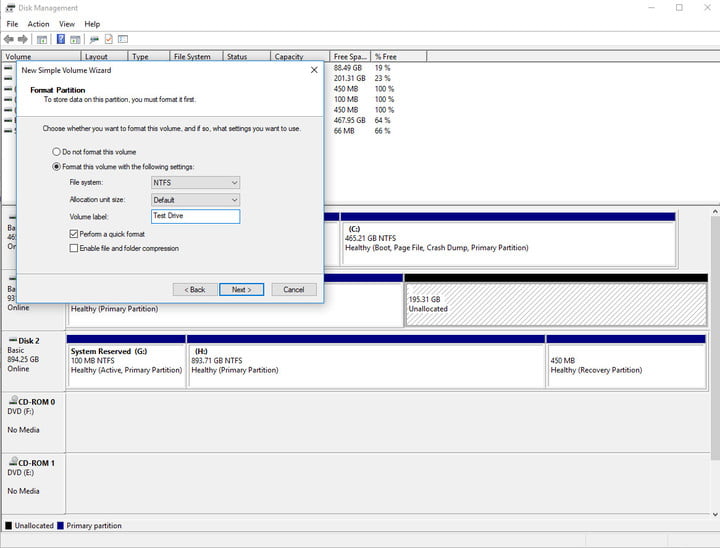
Step-VI
It’s astute to format new or existing hard drives while creating new partition. When giving the option, select to do so. For “file system” choose “NTFS”. The “exFAT” option is generally used for portable devices. You can give it a volume level name if you want . You can follow the default settings for File system, Allocation unit size, and Volume label. If you don’t have more time, choose “quick format” option. A complete format of hard drive is rarely required.
Step-VII
Continue to hit through “Next” buttons and finally, click “Finish” to create the volume. Now you’ve successfully a new hard drive partition.

You’ll be able to see it, and all the info about it on Disk Management Tool.