
Windows 10 permits us to select a color for taskbar, title bar, start menu, selection box and other areas by choosing an accent color to personalize the application.
Unlike Windows 7 and previous Operating System versions, Windows 10 doesn’t have the option to set a color for menu, button text, and windows frame. If you want to change the color of these applications, you need to do it manually.
You can override the default settings and adjust the color. You can also turn the shadow on and off as per your requirement.
Customize App Borders
Windows 10 automatically select a color that suits your monitor’s background. But, if you want to personalize the desktop experience, you can customize the color of app border by performing following steps:
1. Open the “Settings” app.
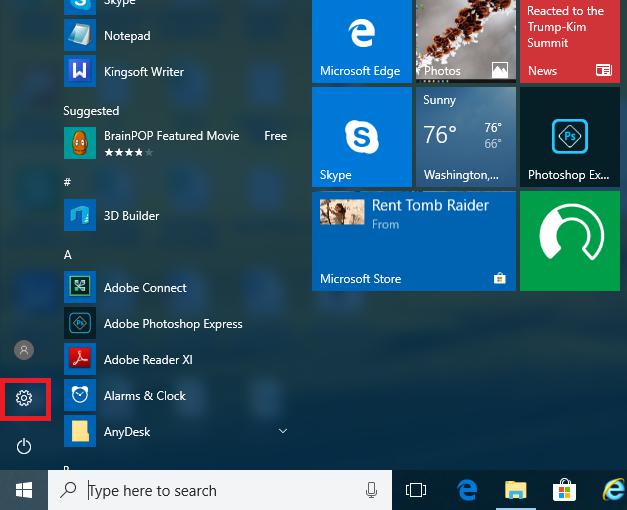
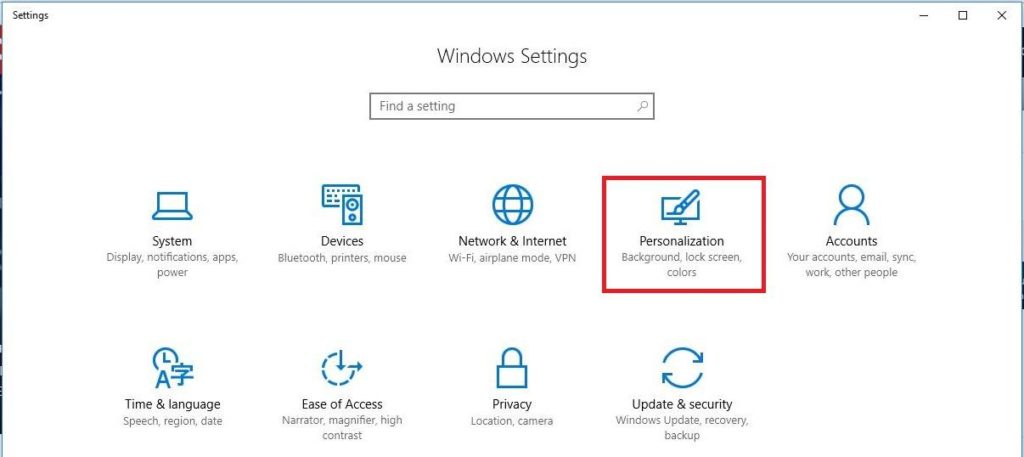
2. Click on “Personalization”.
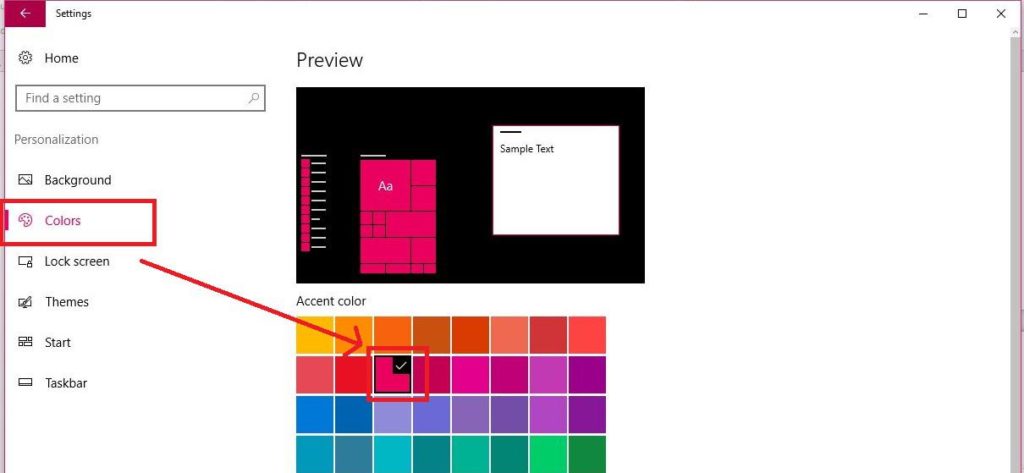
3. Under “Colors”, disable “Automatically pick an accent color from my background” and select the preferred color from the menu in the left-hand panel or entering your own RGB or hex code.
4. Scroll down and toggle on “Make start, taskbar, action center transparent”.
5. On the toggle button to “Show color on start, taskbar, action center”.
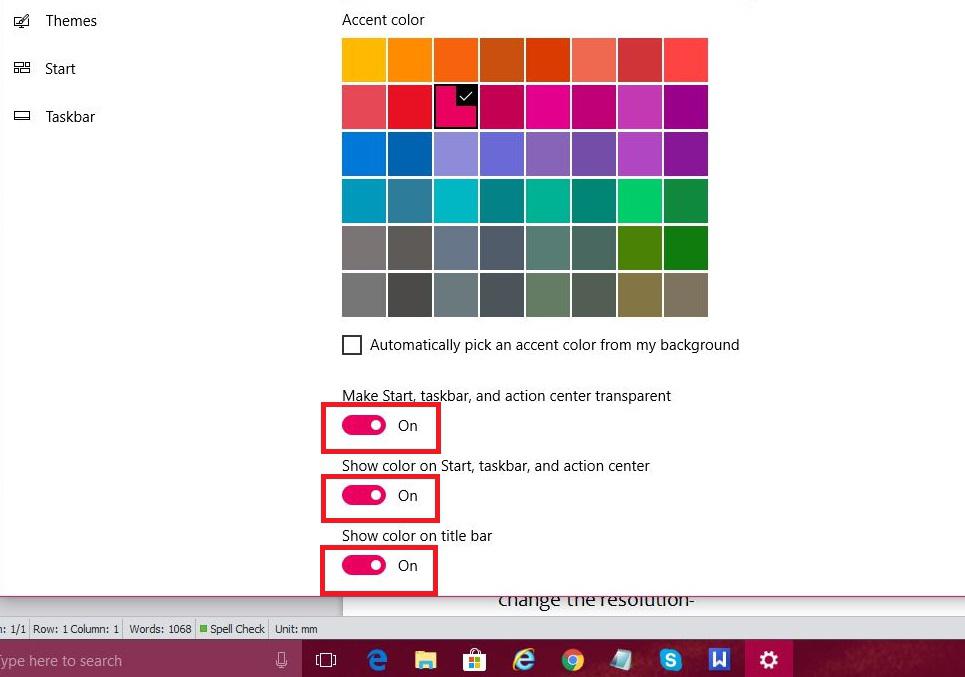
6. Keep the toggle on for “Show color on title bar”.
Enable or Disable Shadows
Drop shadow is enabled by default in each Windows 10. If you don’t want these shadow, you can turn these shadows off. Follow the guidelines to get a clean, flat look with colored Windows 10 border:
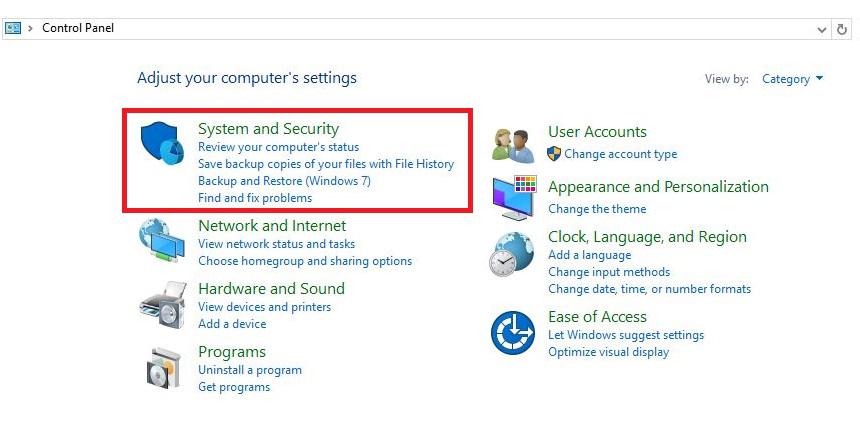
1. Go to “Control Panel”.
Click on “System and Security”.
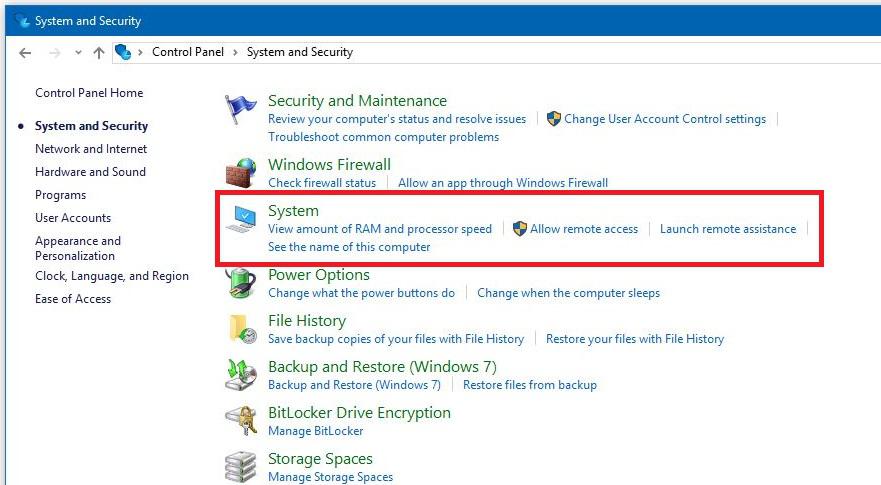
3. Select “System”.
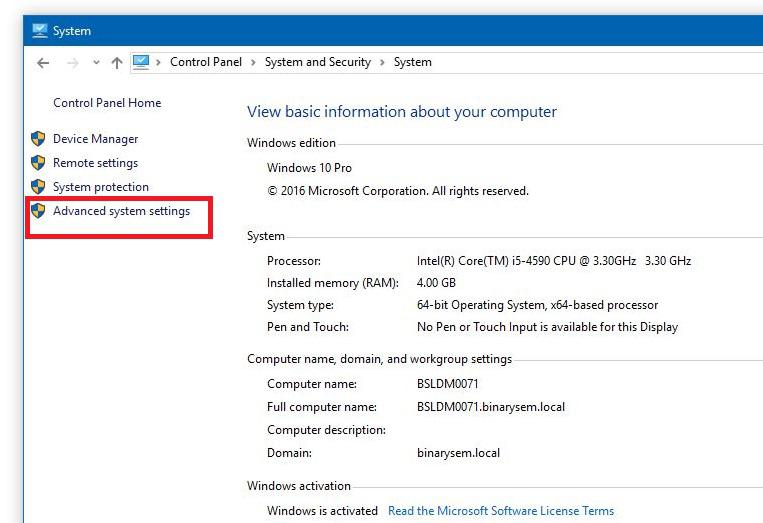
4. Now go to “Advanced System Settings” and choose the tab “Advanced”.
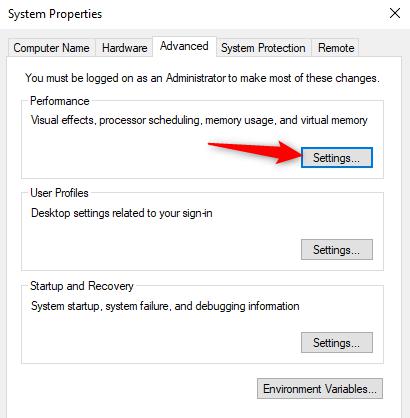
5. In the “Performance” section, click on “Settings”.
6. Click on the “Visual Effects” tab.
7. Mark the check-box next to “Custom”.
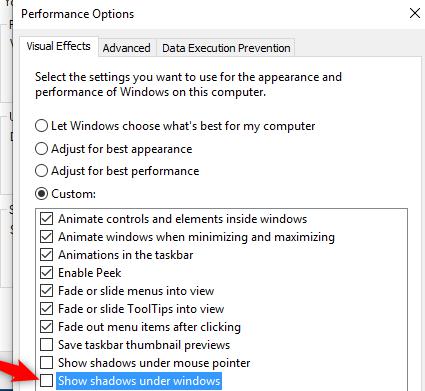
8. Mark or unmark the checkbox next to “Show shadows under windows as preferred”.
9. Click on “Apply”.
10. Finish by clicking on “OK”.
Window shadows will disable instantly. You can repeat the same process if you need to re-enable shadows. Enabling or disabling shadow is the best way to personalize the operating system according to your needs. You can select whether the “Light” or “Dark” theme for Windows 10.